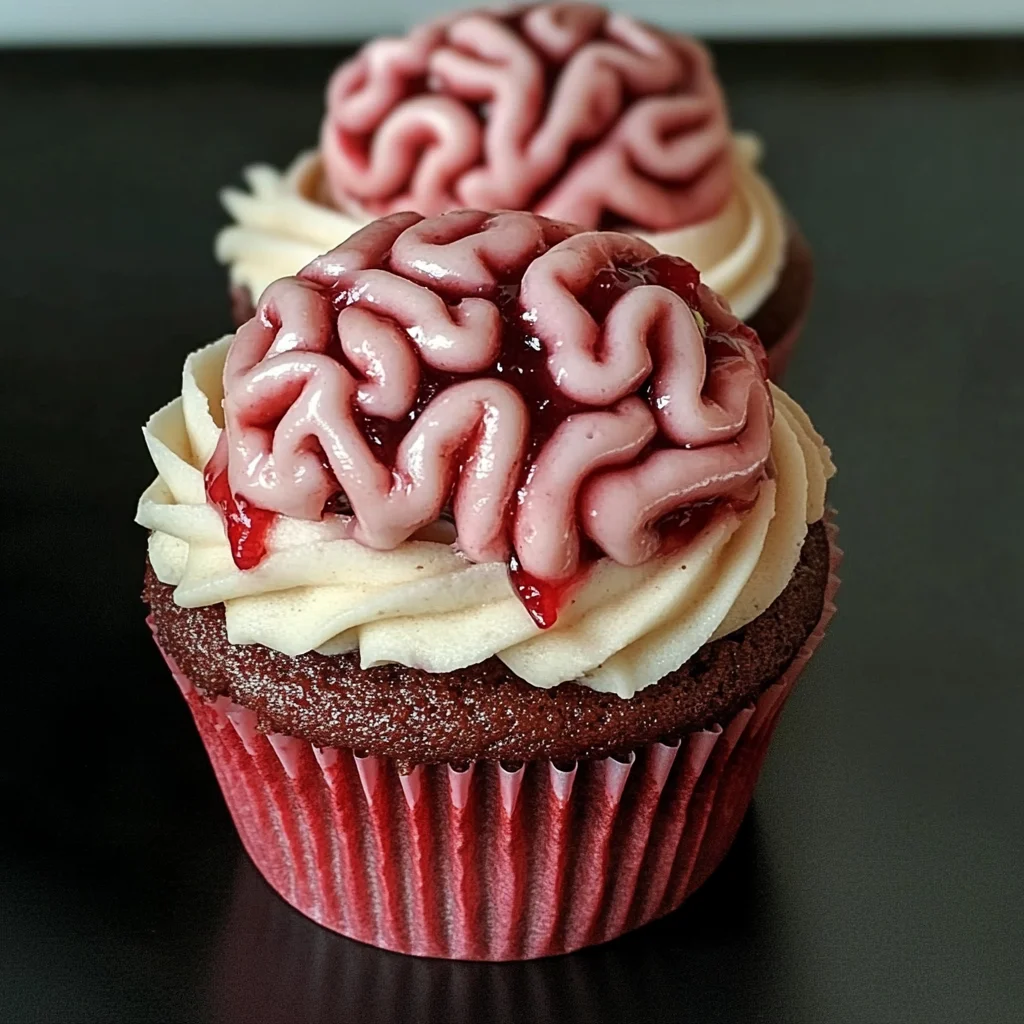
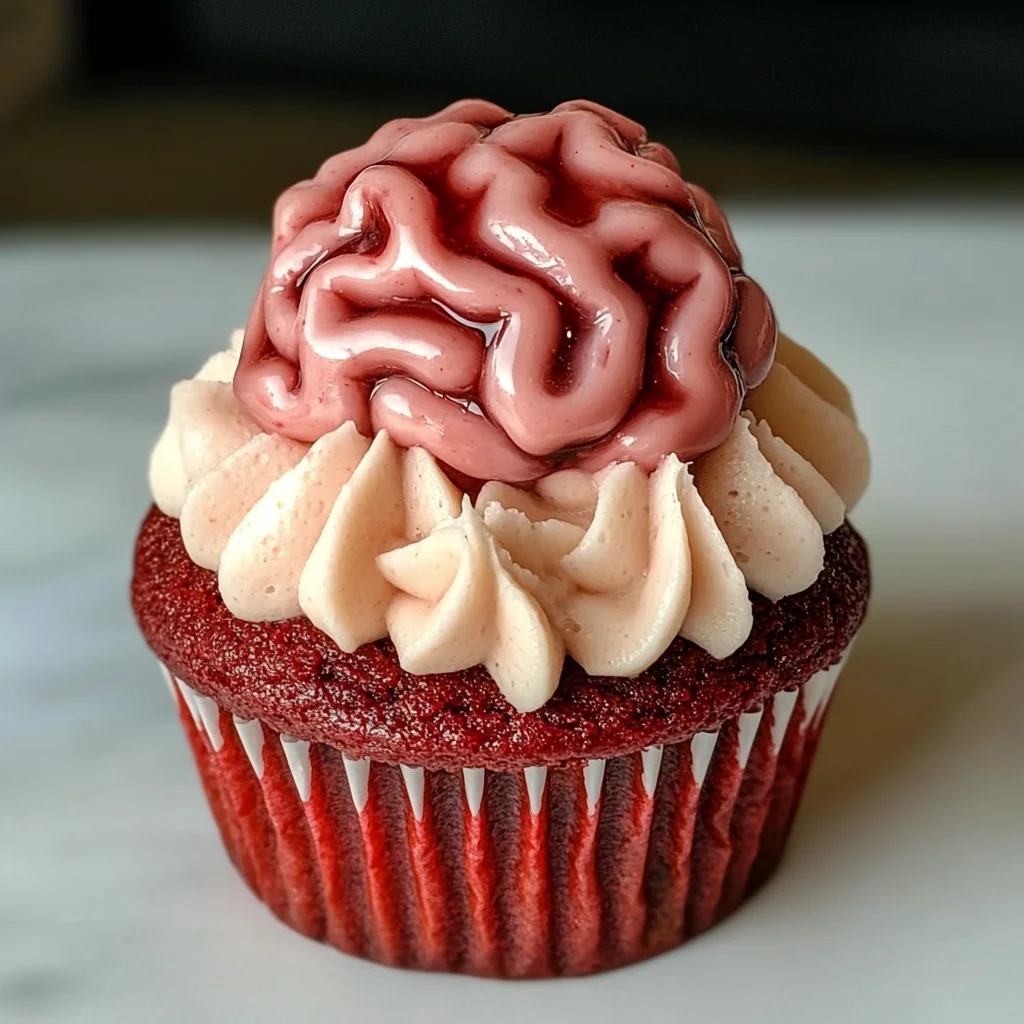
Bleeding Brain Cupcakes are a spooktacular treat that will impress your guests at Halloween parties or themed events. These delightful red velvet cupcakes filled with jam and topped with brain-themed pink icing not only look eerie but also taste amazing. They bring fun and creativity to any dessert table, making them perfect for celebrations or just a unique baking experience at home.
Why You’ll Love This Recipe
- Fun Presentation: The spooky brain design makes these cupcakes a hit for Halloween.
- Delicious Flavor: Rich red velvet flavor combined with sweet jam creates a delightful treat.
- Versatile Occasions: Great for Halloween parties, birthdays, or as a fun baking activity.
- Easy to Make: Simple steps ensure that even beginners can enjoy creating these cupcakes.
- Customizable Toppings: You can adjust the icing colors or add fun decorations to suit your theme.
Tools and Preparation
Having the right tools can make all the difference when making Bleeding Brain Cupcakes. Let’s make sure you’re equipped for success!
Essential Tools and Equipment
- Cupcake tin
- Black cupcake cases
- Electric mixer (with paddle attachment)
- Mixing bowl
- Piping bag
- Circular/round nozzle
- Cooling rack
Importance of Each Tool
- Electric mixer: This tool helps achieve light and fluffy batter quickly, saving time and effort.
- Piping bag: Essential for creating that signature brain effect on top of the cupcakes with precision.
- Cupcake tin: Allows for uniform baking, ensuring each cupcake is perfectly shaped and cooked.
Ingredients
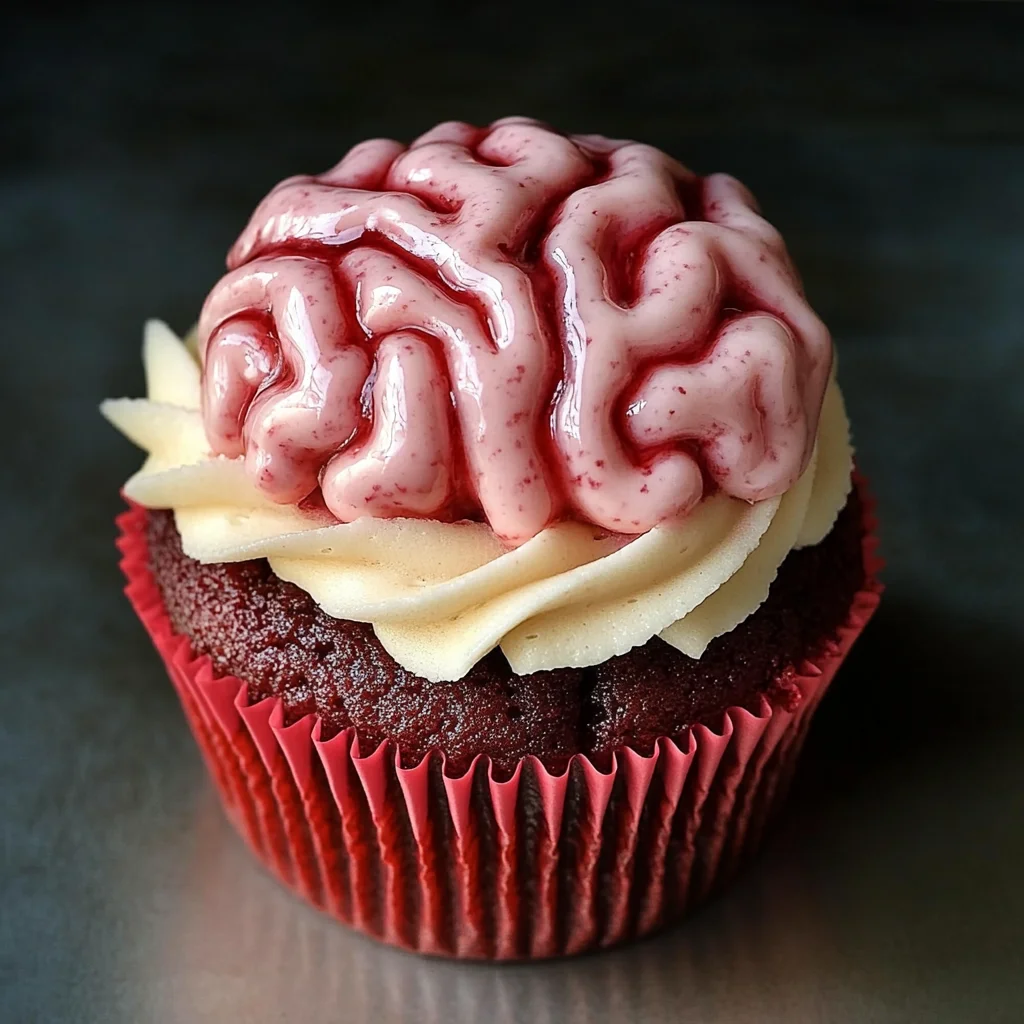
Red velvet cupcake, filled with jam, topped with brain themed pink icing – perfect for Halloween!
For the Cupcakes:
- 150 g Butter or baking spread (softened, unsalted)
- 150 g Caster sugar
- 2 Eggs (large)
- 1 tsp Vanilla extract
- 85 ml Buttermilk
- 165 g Self raising flour
- 1 1/2 tbsp Cocoa powder
- 1/2 tsp Bicarbonate of soda
- 1 tsp Red food colouring (I use Pro Gel or Sugarflair)
For the Filling:
- 200 g Strawberry or Raspberry Jam
For the Buttercream:
- 200 g Butter (unsalted, softened)
- 400 g Icing sugar
- 1 tsp Vanilla extract
- 2 tbsp Milk
- Pink food colouring (I use Pro Gel or Sugarflair)
How to Make Bleeding Brain Cupcakes
Step 1: Preheat the Oven
Preheat your oven to 160C Fan/180C/350F/Gas Mark 4. Line a cupcake tin with black cupcake cases to enhance the spooky look.
Step 2: Prepare the Batter
Whisk together the softened butter and caster sugar in a mixing bowl until fluffy. An electric mixer works best for this step.
Step 3: Add Eggs and Vanilla
Add the large eggs and vanilla extract to the mixture. Mix well until fully incorporated.
Step 4: Combine Remaining Ingredients
Add buttermilk, cocoa powder, bicarbonate of soda, red food coloring, and self-raising flour. Mix until just combined; be careful not to overmix.
Step 5: Fill Cases
Divide the batter evenly between the lined cupcake cases.
Step 6: Bake
Bake in your preheated oven for about 20–25 minutes. Check doneness by inserting a skewer into the center of a cupcake; it should come out clean.
Step 7: Cool Down
Once baked, transfer cupcakes to a cooling rack and allow them to cool completely.
Step 8: Fill with Jam
Once cooled, use a cupcake corer or knife to make holes in each cupcake’s center. Fill each hole with strawberry or raspberry jam using either a small spoon or piping bag.
Step 9: Make Buttercream
In another bowl, mix softened butter alone for a couple of minutes until creamy. Gradually add icing sugar, milk, vanilla extract, and a small amount of pink food coloring. Mix until smooth; adjust consistency with more milk if needed.
Step 10: Pipe the Icing
Transfer buttercream into a piping bag fitted with a circular nozzle. Pipe a line down the center of each cupcake followed by squiggles on either side to mimic brains.
Step 11: Store Properly
Keep your Bleeding Brain Cupcakes in an airtight container in a cool place. Enjoy any leftovers within three days!
How to Serve Bleeding Brain Cupcakes
Serving Bleeding Brain Cupcakes can add a fun twist to your Halloween festivities. These spooky treats are not only delicious but also visually striking. Here are some creative ways to present them.
For a Spooky Dessert Table
- Use themed decorations: Arrange the cupcakes on a black or orange tablecloth, and add Halloween-themed props like plastic spiders or cobwebs for an eerie vibe.
- Mix with other treats: Combine these cupcakes with ghoulish snacks like ghost-shaped cookies or candy eyeballs for an exciting dessert display.
As Party Favors
- Individual packaging: Wrap each cupcake in clear cellophane tied with a black ribbon. This makes for a delightful and portable treat for guests.
- Include a spooky tag: Add a tag with fun Halloween sayings to personalize the cupcakes as party favors.
During Movie Nights
- Serve with themed drinks: Pair the cupcakes with red-colored beverages like cherry soda or berry punch for a chilling movie night experience.
- Create a cozy ambiance: Dim the lights and light some candles to enhance the spooky atmosphere while enjoying your cupcakes.
How to Perfect Bleeding Brain Cupcakes
To ensure your Bleeding Brain Cupcakes turn out perfectly, follow these helpful tips.
- Use room temperature ingredients: This helps create a smoother batter and ensures even mixing, resulting in fluffier cupcakes.
- Measure accurately: For the best results, use kitchen scales and measuring cups. Accurate measurements can make a big difference in texture and flavor.
- Don’t overmix: Once you combine the ingredients, mix just until incorporated. Overmixing can lead to dense cupcakes.
- Cool completely before frosting: Letting the cupcakes cool fully prevents the frosting from melting off and maintains their shape.
- Experiment with colors: Feel free to adjust the food coloring in your icing for desired intensity; however, remember that less is more for achieving that perfect pale pink shade.
Best Side Dishes for Bleeding Brain Cupcakes
Pairing side dishes with your Bleeding Brain Cupcakes can enhance your Halloween spread. Here are some delightful options to consider:
- Witch’s Brew Soup – A creamy green soup made from spinach or split peas, served warm for a cozy addition.
- Monster Eyeball Cheese Balls – Cheese balls shaped like eyeballs, complete with olives for pupils, make an eye-catching snack.
- Ghoulish Guacamole – Serve guacamole decorated with spooky eyes (sliced radishes) alongside crispy tortilla chips.
- Frankenstein Veggie Platter – An assortment of colorful veggies arranged creatively to resemble Frankenstein’s face, served with hummus.
- Spider Deviled Eggs – Traditional deviled eggs topped with olive slices to mimic spiders for a creepy twist on this classic appetizer.
- Graveyard Taco Dip – Layered taco dip garnished with tombstone-shaped tortilla chips creates a festive look while being deliciously satisfying.
Common Mistakes to Avoid
When making Bleeding Brain Cupcakes, it’s easy to make some common errors. Here are some mistakes to watch out for.
- Skipping the room temperature ingredients: Ensure your butter and eggs are at room temperature for better mixing, resulting in a fluffier cupcake.
- Overmixing the batter: Mix just until combined to avoid dense cupcakes. Overmixing can lead to tough texture.
- Not measuring ingredients accurately: Use a kitchen scale or measuring cups to ensure precision, as incorrect measurements can affect the final taste and texture.
- Ignoring the cooling time: Allow cupcakes to cool fully before filling and icing. This prevents melting and ensures better decoration.
- Using too much food coloring: A little goes a long way! Start with small amounts of red food coloring for the perfect hue without overwhelming the flavor.
Storage & Reheating Instructions
Refrigerator Storage
- Store in an airtight container for up to 3 days.
- Keep in a cool area of your fridge to maintain freshness.
Freezing Bleeding Brain Cupcakes
- Freeze unfilled cupcakes for up to 3 months in an airtight container.
- For best results, wrap each cupcake in plastic wrap before placing them in a container.
Reheating Bleeding Brain Cupcakes
- Oven: Preheat oven to 160C (320F) and warm cupcakes for about 10 minutes.
- Microwave: Heat individual cupcakes on medium power for about 10-15 seconds until warm.
- Stovetop: Place in a covered pan over low heat for a few minutes, being careful not to dry them out.
Frequently Asked Questions
What are Bleeding Brain Cupcakes?
Bleeding Brain Cupcakes are red velvet cupcakes filled with jam and topped with brain-themed pink icing, making them perfect for Halloween or themed parties.
Can I customize Bleeding Brain Cupcakes?
Absolutely! You can change the color of the icing or fill them with different jams like blueberry or cherry to suit your taste preferences.
How do I make the icing for Bleeding Brain Cupcakes?
To make the icing, beat softened butter, then add icing sugar, milk, vanilla extract, and pink food coloring until smooth. Pipe it onto cooled cupcakes as desired.
How do I store Bleeding Brain Cupcakes?
Store these cupcakes in an airtight container at room temperature for up to three days, or refrigerate if you want them to last longer.
Can I use other flavors instead of red velvet?
Yes! You can substitute red velvet with chocolate or vanilla cake mix while keeping the same filling and decoration style for a unique twist.
Final Thoughts
Bleeding Brain Cupcakes are not only a fun treat for Halloween but also versatile enough for various occasions. With endless customization options like different jam fillings or icing colors, you can delight your guests while showcasing your baking skills. Give this recipe a try—it’s sure to impress!
Bleeding Brain Cupcakes
- Total Time: 45 minutes
- Yield: 12 servings 1x
Description
Bleeding Brain Cupcakes are the ultimate Halloween treat that combines fun, flavor, and a spooky presentation. These red velvet cupcakes are filled with luscious jam and adorned with a brain-themed pink buttercream icing that will thrill your guests at any Halloween party or themed event. The soft and moist cupcakes paired with the sweet and tangy filling offer a delightful taste experience that is as enjoyable to make as it is to eat. Perfect for kids and adults alike, these whimsical desserts bring creativity to your dessert table. With easy-to-follow steps, even novice bakers can impress everyone this Halloween by whipping up these eerie delights!
Ingredients
- 150 g unsalted butter
- 150 g caster sugar
- 2 large eggs
- 1 tsp vanilla extract
- 85 ml buttermilk
- 165 g self-raising flour
- 1 ½ tbsp cocoa powder
- 1 ½ tsp red food coloring
- 200 g strawberry or raspberry jam (for filling)
- 200 g unsalted butter (for icing)
- 400 g icing sugar
- Pink food coloring
Instructions
- Preheat the oven to 160C Fan/180C/350F.
- In a mixing bowl, cream softened butter and caster sugar until fluffy.
- Beat in eggs and vanilla extract until well mixed.
- Add buttermilk, cocoa powder, bicarbonate of soda, red food coloring, and flour; mix until just combined.
- Divide batter into lined cupcake cases and bake for 20–25 minutes.
- Cool completely before filling with jam and piping pink icing on top.
- Prep Time: 20 minutes
- Cook Time: 25 minutes
- Category: Dessert
- Method: Baking
- Cuisine: American
Nutrition
- Serving Size: 1 serving
- Calories: 335
- Sugar: 32g
- Sodium: 120mg
- Fat: 15g
- Saturated Fat: 9g
- Unsaturated Fat: 5g
- Trans Fat: 0g
- Carbohydrates: 45g
- Fiber: 1g
- Protein: 3g
- Cholesterol: 55mg
Keywords: Use room temperature ingredients for smoother batter. Feel free to customize the jam filling or adjust icing colors to match your theme.