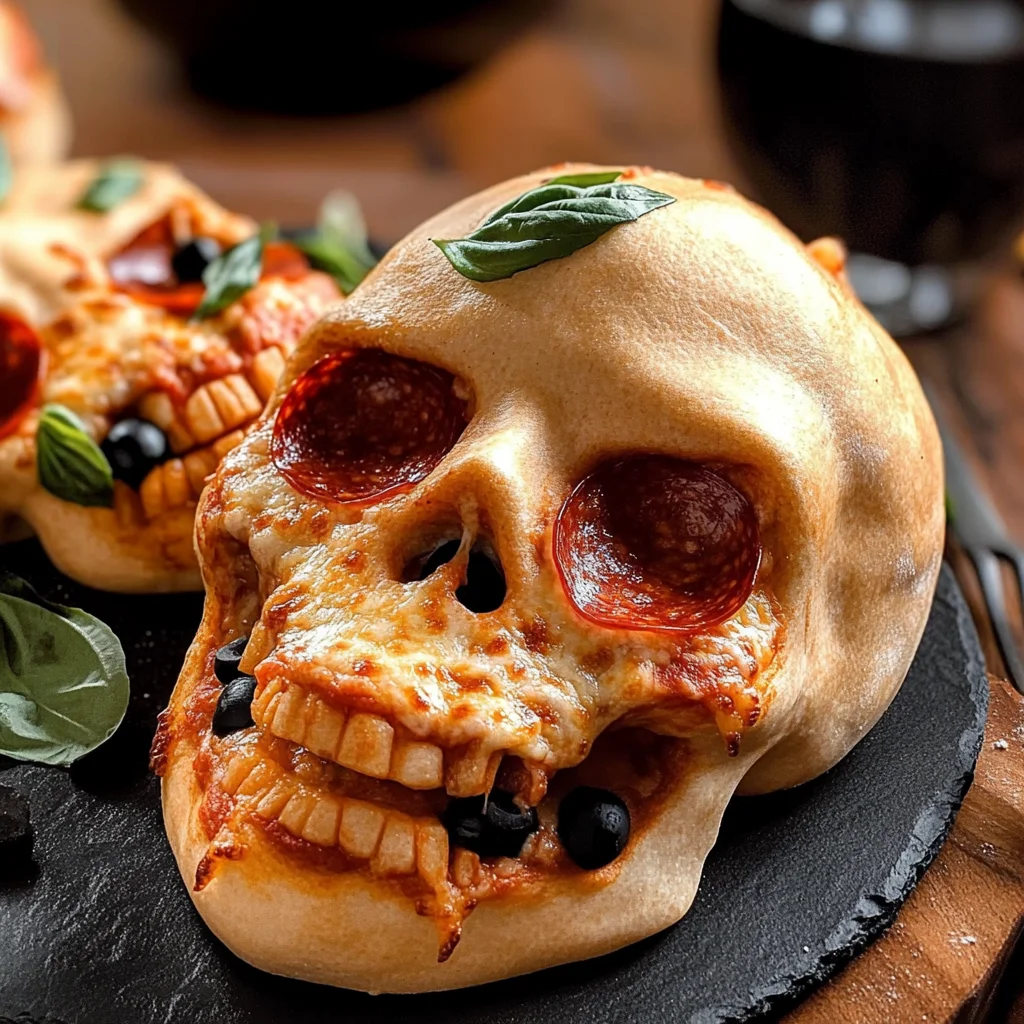
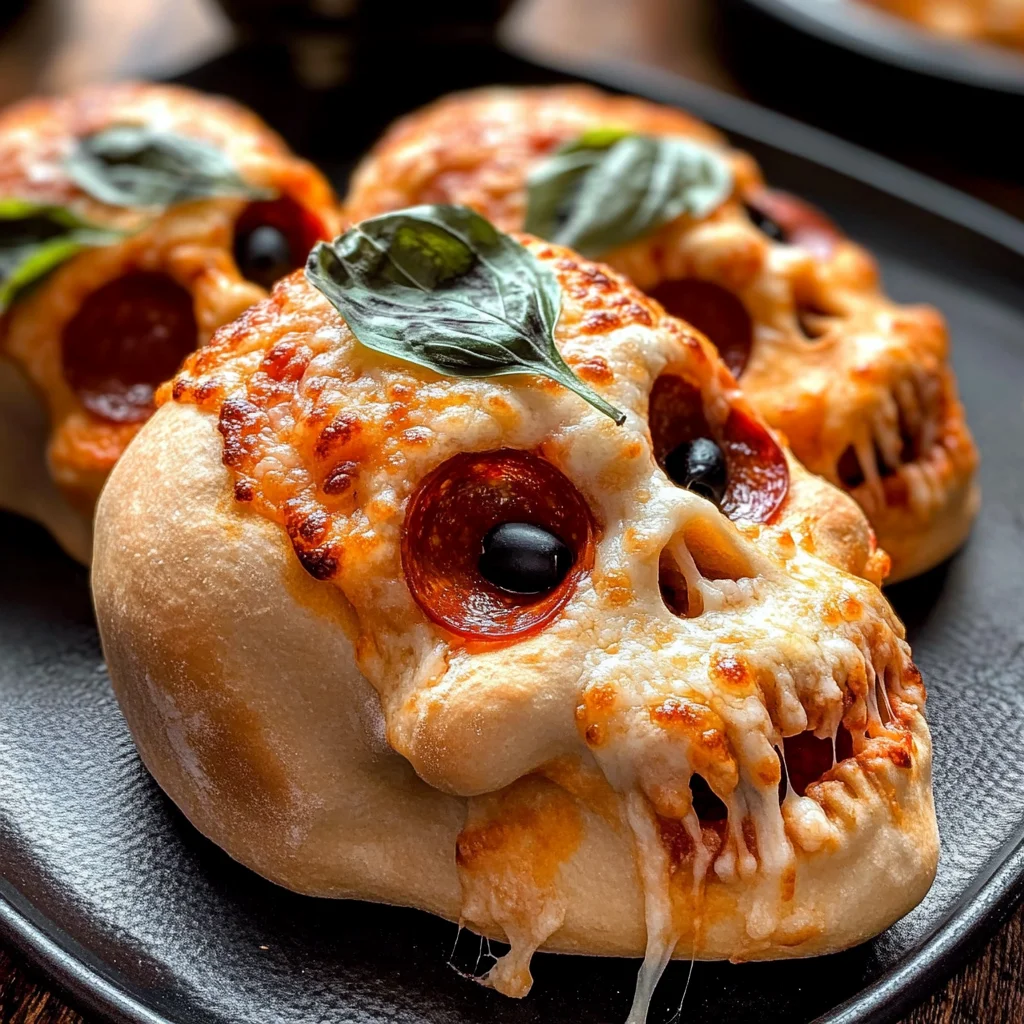
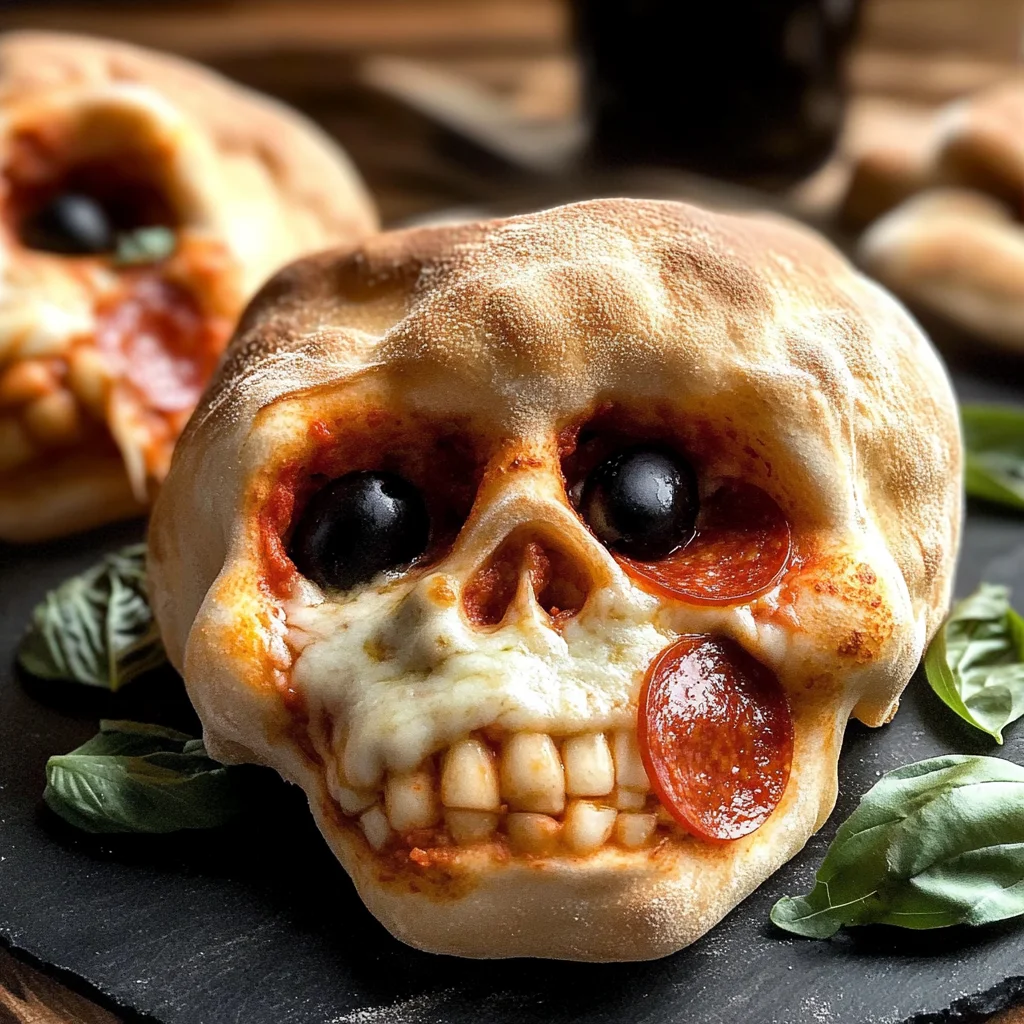
These Cheesy Halloween Pizza Skulls are perfect for adding a fun twist to your spooky season festivities! Not only are they delicious and cheesy, but they also offer a playful presentation that your kids and guests will love. Easy to make and highly customizable, these savory treats can suit various occasions—from Halloween parties to cozy family dinners. Get ready to impress with this unique dish that combines creativity with flavor!
Why You’ll Love This Recipe
- Fun Presentation: The skull shape adds a festive touch to any Halloween gathering.
- Customizable Toppings: Use your favorite ingredients to create personalized flavors.
- Quick Prep Time: With only 10 minutes of prep, you can whip these up in no time.
- Kid-Friendly: A great way to get kids involved in cooking; they can choose their own toppings!
- Great for Parties: These bite-sized treats are perfect for sharing at gatherings.
Tools and Preparation
To make your Cheesy Halloween Pizza Skulls, you’ll need a few essential tools. Having the right equipment makes the process smoother and more enjoyable.
Essential Tools and Equipment
- Mini skull baking tin
- Rolling pin
- Cooking spray
- Mixing bowl
- Sharp knife
Importance of Each Tool
- Mini skull baking tin: This specialized tool creates the perfect shape for your pizza skulls, ensuring they look festive.
- Rolling pin: Helps you roll out the dough evenly, making it easier to fill and seal each skull.
- Cooking spray: Prevents sticking, making it easy to remove the finished pizzas from the tin.
Ingredients
For the Dough
- 13 to 16 ounces of pre-made pizza dough
For the Filling
- 3/4 to 1 cup pizza sauce
- 2 cups shredded mozzarella
- Parmesan cheese (about 1/4 cup)
- Cooked sausage (about 8 ounces for 6 pizza skulls)
- Mini turkey pepperoni (about 6 ounces for 6 pizza skulls)
- Black olives (sliced)
- Sliced chicken ham (chopped)
- Crumble crispy turkey bacon
- Mini Italian meatballs
- Cooked corn kernels
- Baby spinach
- Fresh basil
For Serving
- Marinara sauce for dipping
- Chopped parsley or basil
How to Make Cheesy Halloween Pizza Skulls
Step 1: Prepare the Baking Tin
Start by spraying the mini skull baking tin with cooking spray. This will ensure that your pizza skulls release easily after baking.
Step 2: Roll Out the Dough
Dust your counter lightly with flour to prevent sticking. Use a rolling pin to roll out the dough until it is about 1/4 thick. Cut the dough into six rectangles—don’t worry about perfection here!
Step 3: Fill the Skull Cavities
Take one piece of dough at a time and press it into a skull cavity. Layer each with pizza sauce, shredded mozzarella, Parmesan cheese, and your preferred toppings. Drizzle a bit more pizza sauce on top before sealing.
Step 4: Seal Each Skull
Fold the dough over the fillings, pinching it closed like a small pocket. Repeat this process until all six cavities are filled and sealed.
Step 5: Chill Before Baking
Place the tray in the refrigerator while you preheat your oven. This helps maintain shape during baking.
Step 6: Preheat Your Oven
Set your oven temperature to 400 degrees Fahrenheit so it’s ready when you’re finished preparing the pizzas.
Step 7: Bake Your Pizza Skulls
Remove the tray from refrigeration and carefully place it in the oven. Bake for about 16 to 20 minutes or until they are lightly golden brown—baking times may vary based on your dough type.
Step 8: Cool and Serve
Once baked, let them cool for five minutes before unmolding. Serve warm with marinara sauce and sprinkle with chopped parsley or basil if desired.
Enjoy these delightful Cheesy Halloween Pizza Skulls as an exciting addition to your holiday festivities!
How to Serve Cheesy Halloween Pizza Skulls
These Cheesy Halloween Pizza Skulls are perfect for any Halloween gathering. They are not only fun to make but also delightful to serve. Here are some creative serving suggestions to make your spooky dinner even more enjoyable.
Spooky Dipping Sauces
- Marinara Sauce: Classic and delicious, this tomato-based sauce pairs perfectly with the cheesy goodness of the pizza skulls.
- Garlic Aioli: A creamy garlic dip that adds an extra layer of flavor, making each bite even more scrumptious.
- Ranch Dressing: This cool and tangy dressing offers a wonderful contrast to the warmth of the baked pizza skulls.
Creative Presentation Ideas
- Halloween-Themed Platter: Arrange the pizza skulls on a black or orange platter with spooky decorations for an eye-catching display.
- Garnish with Fresh Herbs: Sprinkle chopped parsley or basil over the skulls for a pop of color and added freshness.
- Use Mini Cauldrons: Serve individual pizza skulls in mini cauldrons for a whimsical touch that fits the Halloween theme.
Fun Serving Utensils
- Skull-Shaped Plates: Use themed plates to enhance the Halloween vibe at your party.
- Witch’s Broom Picks: Insert toothpicks decorated like mini broomsticks into the pizza skulls for easy serving and a fun look.
How to Perfect Cheesy Halloween Pizza Skulls
To achieve the best results with your Cheesy Halloween Pizza Skulls, consider these helpful tips. They will ensure you create tasty and visually appealing treats every time.
- Boldly Flavor Your Filling: Experiment with various toppings such as spices or herbs mixed into your cheese for an extra kick.
- Ensure Proper Sealing: Pinch the dough tightly to prevent any filling from leaking out during baking.
- Adjust Baking Time: Keep an eye on your pizzas while they bake; ovens may vary, so check for that golden brown color.
- Customize Your Dough: Feel free to use whole wheat or gluten-free pizza dough if you prefer a healthier option.
Best Side Dishes for Cheesy Halloween Pizza Skulls
Pairing side dishes with your Cheesy Halloween Pizza Skulls can elevate your meal. Here are some fantastic options that complement their flavors perfectly.
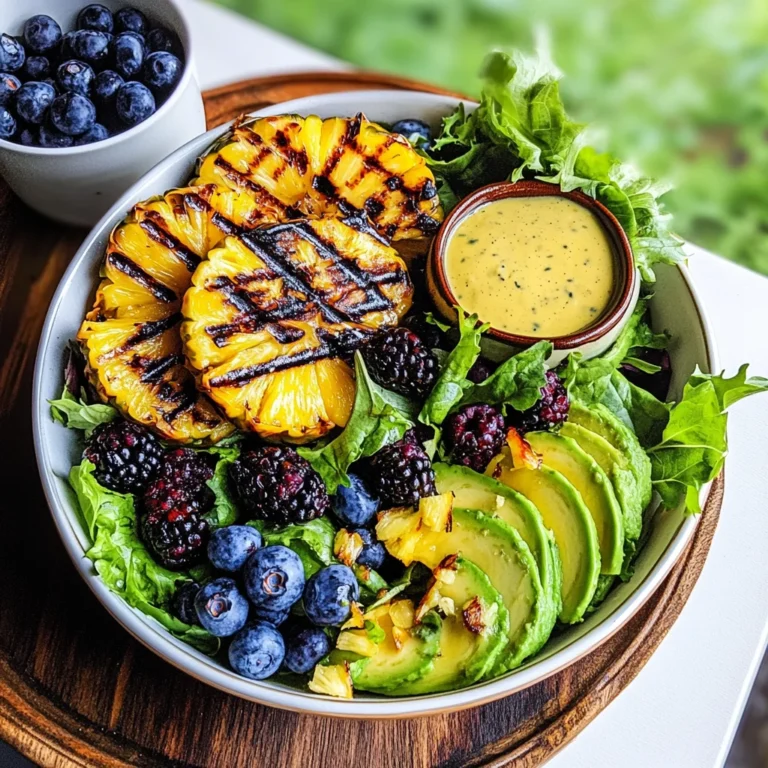
- Crispy Salad: A fresh salad with mixed greens, cucumber, and avocado provides a refreshing crunch alongside your cheesy treats.
- Roasted Veggies: Seasonal roasted vegetables like zucchini and bell peppers add color and nutrition to your dinner table.
- Sweet Potato Fries: These crispy fries bring a hint of sweetness that balances out the savory flavors of the pizza skulls.
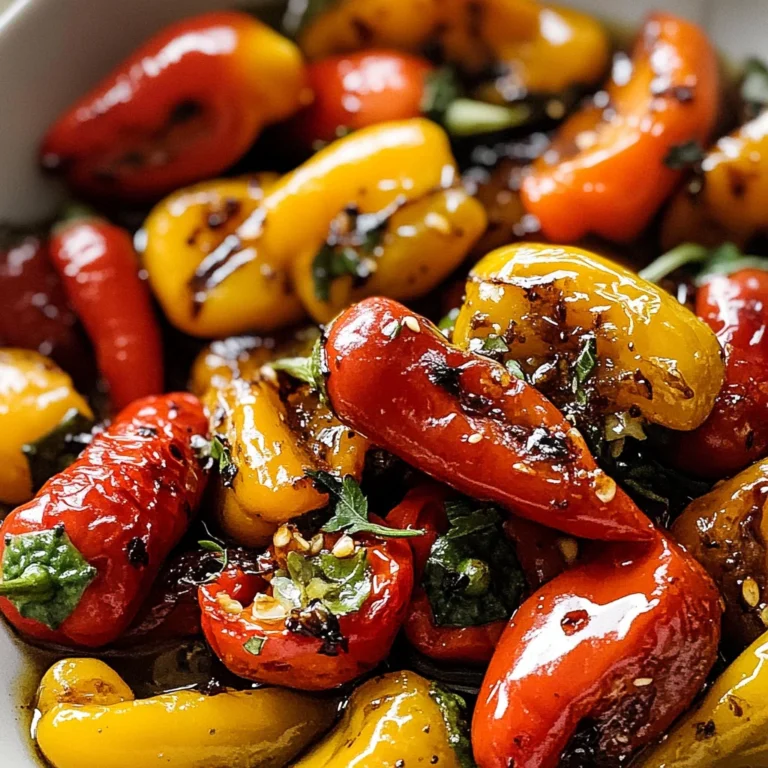
- Stuffed Mini Peppers: Colorful mini peppers stuffed with cream cheese or hummus are both tasty and visually appealing.
- Cheesy Garlic Breadsticks: Serve warm breadsticks topped with melted cheese and garlic for a comforting side dish.
- Vegetable Platter with Dip: A variety of raw veggies paired with ranch or hummus is a healthy option that adds crunch and color.
Common Mistakes to Avoid
Making Cheesy Halloween Pizza Skulls can be fun, but it’s easy to make mistakes. Here are some common pitfalls to watch out for.
- Bold dough handling: Not rolling the dough evenly can result in uneven cooking. Ensure your dough is about 1/4 thick for even baking.
- Bold overfilling: Adding too many toppings can cause the pizzas to burst during baking. Stick to a moderate amount of sauce and toppings.
- Bold improper sealing: Failing to seal the dough properly may lead to filling leakage. Pinch the edges firmly to keep everything inside.
- Bold neglecting preheating: Skipping preheating the oven can lead to undercooked pizza skulls. Always preheat for best results.
- Bold ignoring baking time: Overlooking the baking time can make or break your dish. Keep an eye on them and remove when golden brown.
Storage & Reheating Instructions
Refrigerator Storage
- Store in an airtight container for up to 3 days.
- Allow them to cool completely before sealing.
Freezing Cheesy Halloween Pizza Skulls
- Freeze in a single layer on a baking sheet before transferring them to a freezer-safe container.
- They can be frozen for up to 2 months.
Reheating Cheesy Halloween Pizza Skulls
- Oven: Preheat your oven to 350°F (175°C) and bake for about 10-15 minutes until heated through.
- Microwave: Heat on medium power for 30-second intervals until warm, but this may make them soggy.
- Stovetop: Heat in a skillet over medium heat, covered, for about 5-7 minutes or until warmed completely.
Frequently Asked Questions
Here are some frequently asked questions about making Cheesy Halloween Pizza Skulls.
Can I customize my Cheesy Halloween Pizza Skulls?
Yes! You can use any toppings, such as vegetables or different meats, based on your preferences.
How do I prevent my pizza skulls from sticking?
Using cooking spray on your baking tin and dusting flour on the counter will help prevent sticking.
Can I make these ahead of time?
Absolutely! You can prepare and fill them ahead of time and store them in the refrigerator until you’re ready to bake.
What are some good dips for Cheesy Halloween Pizza Skulls?
Marinara sauce is a classic choice, but you could also try ranch dressing or garlic sauce.
Final Thoughts
Cheesy Halloween Pizza Skulls are not only delightful but also versatile. You can easily customize them with your favorite ingredients, making them perfect for parties or family dinners. Give this fun recipe a try, and enjoy creating spooky treats that everyone will love!

Cheesy Halloween Pizza Skulls
- Total Time: 30 minutes
- Yield: Makes approximately 6 servings 1x
Description
Get ready to celebrate Halloween with these delightful Cheesy Halloween Pizza Skulls! These fun, cheesy treats are not only delicious but also visually captivating, making them perfect for parties or family gatherings. With an easy-to-follow recipe, you can customize the fillings to suit your taste preferences, ensuring every bite is a flavorful surprise. Whether you’re hosting a spooky bash or enjoying a cozy night in, these pizza skulls will bring a festive touch to your meal. Make cooking a family affair by letting the kids pick their favorite toppings, and watch as they enjoy this creative cooking experience!
Ingredients
- 13 to 16 ounces of pre-made pizza dough
- 3/4 to 1 cup pizza sauce
- 2 cups shredded mozzarella cheese
- 1/4 cup Parmesan cheese
- Cooked turkey sausage or turkey pepperoni (6 ounces)
- Black olives (sliced)
- Chopped cooked chicken
- Mini Italian meatballs
- Fresh spinach
- Marinara sauce for dipping
Instructions
- Preheat oven to 400°F. Spray a mini skull baking tin with cooking spray.
- Roll out the pizza dough on a floured surface until about 1/4 inch thick and cut into rectangles.
- Press each piece of dough into the skull cavities and layer with pizza sauce, cheeses, and desired toppings.
- Fold the dough over the fillings and pinch to seal tightly.
- Refrigerate the tray while preheating the oven.
- Bake for 16 to 20 minutes until golden brown.
- Cool slightly before serving warm with marinara sauce.
- Prep Time: 10 minutes
- Cook Time: 20 minutes
- Category: Dinner
- Method: Baking
- Cuisine: American
Nutrition
- Serving Size: 1 pizza skull (approximately 100g)
- Calories: 240
- Sugar: 2g
- Sodium: 480mg
- Fat: 10g
- Saturated Fat: 4g
- Unsaturated Fat: 4g
- Trans Fat: 0g
- Carbohydrates: 28g
- Fiber: 2g
- Protein: 12g
- Cholesterol: 30mg
Keywords: Feel free to mix up your toppings with veggies or different meats based on your preferences. For a healthier option, use whole wheat or gluten-free pizza dough.